We’ll be using AWS CLI on a Debian Linux VM.
Revision history (dd/mm/yy):
24/04/2014 – added “Configure Routing on Ubuntu/Debian VM” section.
28/08/2014 – added “Make Static Routes Persistent after Reboot” section.
Installation
On a Debian PC we’re going to work from, install Python pip:
# apt-get update && apt-get install python2.7 python-pip
Install awscli package:
# pip install awscli
Configure awscli if using for the first time:
$ aws configure
AWS Access Key ID [****************YAPH]:
AWS Secret Access Key [****************+qKv]:
Default region name [eu-west-1]:
Default output format [text]:
The following set of IAM permissions should be sufficient:
{ "Version": "2012-10-17",
  "Statement": [
    { "Effect": "Allow",
      "Action": [
        "ec2:AllocateAddress",
        "ec2:AssociateAddress",
        "ec2:AttachNetworkInterface",
        "ec2:CreateNetworkInterface",
        "ec2:DescribeInstances",
        "ec2:DescribeNetworkInterfaces",
        "ec2:DescribeSecurityGroups",
        "ec2:DescribeSubnets",
        "ec2:DetachNetworkInterface"
      ],
      "Resource": ["*"]
    }]
}
Configuration
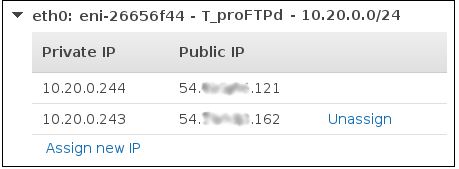
See our EC2 instance’s details below:
- Subnet: 10.20.0.0/24
- Security group name: FW-01
Note that each instance has it’s dedicated security group.
Get VPC Subnet ID
We need to know the VPC subnet’s ID:
$ aws ec2 describe-subnets | grep 10.20
SUBNETS	eu-west-1b 231 10.20.0.0/24 False False available subnet-08202861 vpc-3220285b
Get Security Group ID
We also need to know the security group’s ID:
$ aws ec2 describe-security-groups | grep -i fw-01
SECURITYGROUPS FW-01 sg-1908e47c FW-01 1*********483 vpc-3220285b
Get List of Private IPs in Use
As we want to assign a static private IP, we need to know the ones that aren’t in use. Let us get a list of private IPs which are in use:
$ aws ec2 describe-network-interfaces | egrep "PRIVATEIP.*10.20" | cut -f3-4 | sort
10.20.0.10
10.20.0.200
10.20.0.201
10.20.0.202
10.20.0.203
10.20.0.205
10.20.0.206
10.20.0.210
10.20.0.241
10.20.0.243
10.20.0.244
10.20.0.40
10.20.0.60
We should be able to use 10.20.0.11 as it is not taken yet.
Create New Network Interface
Create a new network interface with a private IP of 10.20.0.11 for the subnet subnet-08202861 and the security group sg-1908e47c:
$ aws ec2 create-network-interface --subnet-id subnet-08202861 --description "2ndEIP" --groups sg-1908e47c --private-ip-address 10.20.0.11
NETWORKINTERFACE eu-west-1b 2ndEIP [...] eni-46c51d23 [...] 10.20.0.11 [...] subnet-08202861 vpc-3220285b
GROUPS sg-1908e47c FW-01
PRIVATEIPADDRESSES True 10.20.0.11
Allocate EIP for VPC
EIP will be associated with the newly created network interface.
$ aws ec2 allocate-address --domain vpc
eipalloc-54534336 vpc 54.72.XX.6
Get Instance ID
In our particular case, each instance has a separate security group, or in other words, its own dedicated firewall rules. Therefore one security groups is tidied with a single instance only. If we know the security group, we can find the instance ID:
$ aws ec2 describe-instances --filters "Name=instance.group-id,Values=sg-1908e47c" | \
grep -w "i-........" | cut -f8
i-846943c5
Attached Network Interface to Instance
$ aws ec2 attach-network-interface --network-interface-id eni-46c51d23 --instance-id i-846943c5 --device-index 1
eni-attach-2473bd6a
Associate EIP with Network Interface
$ aws ec2 associate-address --allocation-id eipalloc-54534336 --network-interface-id eni-46c51d23
eipassoc-fd45ba98	true
Check All EIPs Assigned to Instance
$ aws ec2 describe-instances --filters "Name=instance.group-id,Values=sg-1908e47c" | \
grep -i assoc | cut -f4 | uniq
54.72.XX.201
54.72.XX.6
Detach Network Interface
We can detached a network interface if we don’t need it:
$ aws ec2 detach-network-interface --attachment-id eni-attach-2473bd6a
true
Configure Routing on Ubuntu/Debian VM (edited: 24/04/2014)
Tested on Ubuntu 12.04/14.04 and Debian Wheezy VMs.
SSH into the VM once it’s up and running. You’ll notice that the eth1 interface has no private IP assigned yet:
# ifconfig -a | egrep 'eth|inet.*10.20'
eth0      Link encap:Ethernet  HWaddr 02:eb:10:eb:2e:69
          inet addr:10.20.0.10  Bcast:10.20.0.255  Mask:255.255.255.0
eth1      Link encap:Ethernet  HWaddr 02:48:1f:84:f3:09
The routing table should look something like this:
# route -n
Kernel IP routing table
Destination     Gateway         Genmask         Flags Metric Ref    Use Iface
0.0.0.0         10.20.0.1       0.0.0.0         UG    0      0        0 eth0
10.20.0.0       0.0.0.0         255.255.255.0   U     0      0        0 eth0
For Ubuntu, create a config file for the eth1 interface:
# cp /etc/network/interfaces.d/eth0.cfg /etc/network/interfaces.d/eth1.cfg
Open the eth1 config file /etc/network/interfaces.d/eth1.cfg and change all occurrences of eth0 to eth1 so the file would look like:
# cat /etc/network/interfaces.d/eth1.cfg
# The secondary network interface
auto eth1
iface eth1 inet dhcp
For Debian, add configuration to /etc/network/interfaces:
# echo "auto eth1" >>/etc/network/interfaces
# echo "iface eth1 inet dhcp" >>/etc/network/interfaces
Bring the eth1 interface up:
# ifup eth1
Internet Systems Consortium DHCP Client 4.2.4
Copyright 2004-2012 Internet Systems Consortium.
All rights reserved.
For info, please visit https://www.isc.org/software/dhcp/

Listening on LPF/eth1/02:48:1f:84:f3:09
Sending on   LPF/eth1/02:48:1f:84:f3:09
Sending on   Socket/fallback
DHCPDISCOVER on eth1 to 255.255.255.255 port 67 interval 3 (xid=0x58501c6e)
DHCPREQUEST of 10.20.0.11 on eth1 to 255.255.255.255 port 67 (xid=0x58501c6e)
DHCPOFFER of 10.20.0.11 from 10.20.0.1
DHCPACK of 10.20.0.11 from 10.20.0.1
bound to 10.20.0.11 -- renewal in 1532 seconds.
Double-check that the private IP has been assigned:
# ifconfig -a | egrep 'eth|inet.*10.20'
eth0      Link encap:Ethernet  HWaddr 02:eb:10:eb:2e:69
          inet addr:10.20.0.10  Bcast:10.20.0.255  Mask:255.255.255.0
eth1      Link encap:Ethernet  HWaddr 02:48:1f:84:f3:09
          inet addr:10.20.0.11  Bcast:10.20.0.255  Mask:255.255.255.0
Create a custom route table named “out”:
# echo "200 out" >>/etc/iproute2/rt_tables
Check:
# cat /etc/iproute2/rt_tables
#
# reserved values
#
255	local
254	main
253	default
0	unspec
#
# local
#
#1	inr.ruhep
200 out
List the kernel’s routing table to find out the default gateway:
# route -n
Kernel IP routing table
Destination     Gateway         Genmask         Flags Metric Ref    Use Iface
0.0.0.0         10.20.0.1       0.0.0.0         UG    0      0        0 eth0
10.20.0.0       0.0.0.0         255.255.255.0   U     0      0        0 eth0
10.20.0.0       0.0.0.0         255.255.255.0   U     0      0        0 eth1
Add a rule to route eth1 traffic via default gateway:
# ip route add default via 10.20.0.1 dev eth1 table out
Add routing rules to route all traffic from/to IP 10.20.0.11, which is assigned to the eth1 interface, via the “out” routing table:
# ip rule add from 10.20.0.11/32 table out
# ip rule add to 10.20.0.11/32 table out
# ip route flush cache
Check the “out” routing table to be sure:
# ip route show table out
default via 10.20.0.1 dev eth1
Here’s how all route entries in the kernel look like:
# ip route list
default via 10.20.0.1 dev eth0
10.20.0.0/24 dev eth0  proto kernel  scope link  src 10.20.0.10
10.20.0.0/24 dev eth1  proto kernel  scope link  src 10.20.0.11
The routing policy rules can be seen below:
# ip rule list
0:	from all lookup local
32764:	from all to 10.20.0.11 lookup out
32765:	from 10.20.0.11 lookup out
32766:	from all lookup main
32767:	from all lookup default
At this point, you should be able to ping EIPs assigned to both eth0 and eth1.
$ ping -c2 54.72.XX.201
PING 54.72.XX.201 (54.72.XX.201) 56(84) bytes of data.
64 bytes from 54.72.XX.201: icmp_req=1 ttl=50 time=17.9 ms
64 bytes from 54.72.XX.201: icmp_req=2 ttl=50 time=17.8 ms

--- 54.72.XX.201 ping statistics ---
2 packets transmitted, 2 received, 0% packet loss, time 1000ms
rtt min/avg/max/mdev = 17.835/17.912/17.989/0.077 ms
$ ping -c2 54.72.XX.6
PING 54.72.XX.6 (54.72.XX.6) 56(84) bytes of data.
64 bytes from 54.72.XX.6: icmp_req=1 ttl=51 time=18.2 ms
64 bytes from 54.72.XX.6: icmp_req=2 ttl=51 time=22.8 ms

--- 54.72.XX.6 ping statistics ---
2 packets transmitted, 2 received, 0% packet loss, time 1000ms
rtt min/avg/max/mdev = 18.279/20.543/22.807/2.264 ms
Make Static Routes Persistent after Reboot (edited: 28/08/2014)
Tested on Ubuntu only.
# cat /etc/network/interfaces.d/eth0.cfg
# The primary network interface
auto eth0
iface eth0 inet dhcp
# cat /etc/network/interfaces.d/eth1.cfg
# The secondary network interface
auto eth1
iface eth1 inet static
 address 10.20.0.11
 netmask 255.255.255.0
 up ip route add default via 10.20.0.1 dev eth1 table out
 up ip rule add from 10.20.0.11/32 table out
 up ip rule add to 10.20.0.11/32 table out
 up ip route flush cache
Disclaimer
Jeff Barr wrote: “I should note that attaching two public ENIs to the same instance is not the right way to create an EC2 instance with two public IP addresses. There’s no way to ensure that packets arriving via a particular ENI will leave through it without setting up some specialized routing.”
Despite the fact that it’s not reflected here, the original idea behind this article was to bridge 2 different VPCs.
Since AWS started to support multiple private IPs assigned to a single network interface, EIPs can be associated to private IPs by using a single network card:
What must my /etc/network/interfaces file on debian look like?
Must I run any commands after for asymmetrical routing? Thank you for your help
I have gotten this far, but I cannot ping the second EIP.
Hi Sam, I’ve updated the post for you with the routing bit. I hope that solves your problem.
After step:
ip rule add from 10.20.0.11/32 table out
root@ip-172-xx-13-xxx:/home/ubuntu# ip rule add from 172.xx.10.xxx/20 table out
Write failed: Broken pipe
EC2 instance crashed and connect impossible (ssh). Only instance termination will help.
Is any solution for it?
Have you followed the article by word? Routing works perfectly on Ubuntu 14.04.
A bit late to the party, but for anyone arriving here looking for this – try removing one of the network interfaces from the instance and force restart the instance. I rebuilt from the ground up twice before I found this article, and then once again when I missed a step above. I eventually figured (as my mental stability began to fade) that removing a NIC would force the OS to re-evaluate it’s config at startup.
And for debian wheezy the same result:
root@ip-172-xx-7-xxx:/home/admin# route -n
Kernel IP routing table
Destination Gateway Genmask Flags Metric Ref Use Iface
0.0.0.0 172.31.0.1 0.0.0.0 UG 0 0 0 eth0
169.254.0.0 0.0.0.0 255.255.0.0 U 0 0 0 eth0
172.31.0.0 0.0.0.0 255.255.240.0 U 0 0 0 eth0
172.31.0.0 0.0.0.0 255.255.240.0 U 0 0 0 eth1
root@ip-172-xx-7-xxx:/home/admin# ip route add default via 172.31.0.1 dev eth1 table out
root@ip-172-xx-7-xxx:/home/admin# ip rule add from 172.31.0.0/20 table out
Write failed: Broken pipe
You’re defining the whole 172.31.0.0/20 network, when you need to define your private IP address assigned to the eth1 interface.
Yay, it’s really nice! Thanks! It was my fault that i tried to define whole network. Now it works fine.
Thanks. I’m glad you finally got it all working.
But after rebooting my eth0 interface is not accessible more. SSH connect i’ll take only through eth1 public ip, and i can’t ping eth0 public ip. Any ideas?
Have you made the static routes persistent? If not, these were naturally lost after you rebooted the server.
should i place commands “ip route && ip rule add” with static routes definition to?
example for eth1:
auto eth1
iface eth1 inet static
address 172.31.10.172
netmask 255.255.240.0
network 172.31.0.0
broadcast 172.31.15.255
up ip route add default via 172.31.0.1 dev eth1 table out #?
up ip rule add from 172.31.10.172 table out #?
up ip rule add to 172.31.10.172 table out #?
…
up ip addr add 172.31.1.67/20 dev eth0
I edited the article and added my configuration from Ubuntu 14.04. You should be good to go with this:
Do you left for eth0 interface “iface eth0 inet dhcp” or replaced it to static?
Left with DHCP. It’s a static DHCP lease anyway (IP doesn’t change) as I specified the primary IP for eth0 manually when created my EC2 instance.
Great, it’s awesome! Now stack is working. Thank you for great tutorial and quick answers ;)
Always welcome.
Why when i add this line “up ip addr add 172.31.1.67/20 dev eth1” to eth1 it not works, but from eth0 “up ip addr add 172.31.10.125/20 dev eth0” same works.
auto eth1
iface eth1 inet static
 address 172.31.10.172
 netmask 255.255.240.0
 network 172.31.0.0
 broadcast 172.31.15.255
 up ip route add default via 172.31.0.1 dev eth1 table out
 up ip rule add from 172.31.10.172/32 table out
 up ip rule add to 172.31.10.172/32 table out
 up ip route flush cache
up ip addr add 172.31.1.67/20 dev eth1
eth1 primary public ip is available, but additional public ip from 172.31.1.67/20 is not available.
Here eth0 that’s worked fine:
auto eth0
iface eth0 inet dhcp
up ip addr add 172.31.10.125/20 dev eth0
I don’t know what you’re trying to achieve nor I know what your environment is, but I have a feeling that it may be a bit beyond the scope of this article.
When you say it doesn’t work do you mean that you cannot add a secondary private IP via “ip addr” command? From the post above, have you assigned the secondary private IP 172.31.1.67 to your network card on AWS? If so, is it tidied with an EIP?
Yes, i try to assign secondary private ip 172.31.1.67 to eth1 interface using command “up ip addr add 172.31.1.67/20 dev eth1”. All private ips is tided with EIP.
And ping to private ip 172.31.1.67 works, but ping to his public ip failed. In eth1 i use static routing like you described earlier.
Can you post the output of the following?
ubuntu@ip-172-31-9-253:~$ ip addr
1: lo: mtu 65536 qdisc noqueue state UNKNOWN group default
link/loopback 00:00:00:00:00:00 brd 00:00:00:00:00:00
inet 127.0.0.1/8 scope host lo
valid_lft forever preferred_lft forever
inet6 ::1/128 scope host
valid_lft forever preferred_lft forever
2: eth0: mtu 9001 qdisc pfifo_fast state UP group default qlen 1000
link/ether 0a:cd:5d:ec:a3:13 brd ff:ff:ff:ff:ff:ff
inet 172.31.9.253/20 brd 172.31.15.255 scope global eth0
valid_lft forever preferred_lft forever
inet 172.31.10.125/20 scope global secondary eth0
valid_lft forever preferred_lft forever
inet6 fe80::8cd:5dff:feec:a313/64 scope link
valid_lft forever preferred_lft forever
3: eth1: mtu 1500 qdisc pfifo_fast state UP group default qlen 1000
link/ether 0a:74:e6:54:ba:c9 brd ff:ff:ff:ff:ff:ff
inet 172.31.10.172/20 brd 172.31.15.255 scope global eth1
valid_lft forever preferred_lft forever
inet 172.31.1.67/20 scope global secondary eth1
valid_lft forever preferred_lft forever
inet6 fe80::874:e6ff:fe54:bac9/64 scope link
valid_lft forever preferred_lft forever
ubuntu@ip-172-31-9-253:~$ curl –interface 172.31.10.172 ifconfig.me
54.77.XXX.178
ubuntu@ip-172-31-9-253:~$ curl –interface 172.31.1.67 ifconfig.me
Timeout error
OK, enter the following:
And then try the curl command which timed out again. If it returns the public EIP assigned to 172.31.1.67, then you should be able to ping it.
Yes, it returns. Thank you!
Don’t forget to add the rules to your network config file to make them persistent across reboots.
Done. Now exactly works fine.
This may be old, but I’ll give it a shoot. Your example works great for all incoming traffic (to the private and public addresses, on both interfaces), but I can’t get outgoing traffic form eth1 to work. So ping -I eth1 google.com return network unreachable. Is there any other rule I should add?
Thanks!
Hi Stefan, I wish I could help, but I no longer use AWS. You may need an asynchronous routing here.
Hi Tomas, great post. It was really useful to me.
I was using one EIP and switching it back and forth between two interfaces. With EIP assigned to eth1, the instance lost its public DNS and it did not have inernet access, despite it was possible to ping EIP across the internet.
Any thought on that.
Many thanks,
Ibrahim
Sorry, I don’t quite understand your problem. So an EIP was still attached to your server, but there was no public DNS?
One EIP used here and I moved it back and forth between eth0 & eth1. When I attached it to eth1 there was no public DNS, So the answer is yes to your question.
Do you have DNS hostnames enabled for your VPC? Each instance should be given a public DNS hostname when the instance is associated with an EIP address.
Yes, I do. It’s the case when associating the EIP to eth0, but not in case of eth1, the newly added interface.
I have on-premise VMs, which should request IPs from the AWS VPC dhcp server. The VMs could not get IPs from AWS.
Also, in the two interfaces scenario, I configured Bridge (br0) through eth1. That may help you understand my issue here with public DNS.
Can you help me with that?
Ibrahim
I don’t think I can as I don’t use AWS On-Premises instances, and I don’t have bridged interfaces. You’re trying to do something that’s outside the scope of this article. Feel free to let us know how you get on, as it may be useful to others.
I cannot do this step ‘Create a custom route table named “out”’. I have ubuntu EC2 instance.
sudo echo “200 out” >> /etc/iproute2/rt_tables
-bash: /etc/iproute2/rt_tables: Permission denied
Is it blocked by AWS?
You can’t use sudo to affect output redirection, because redirection is done by the calling shell.
Try as the root user, it should work.
yes. as a root it worked! 10x.
For others, before executing this step switch to root “sudo su – root”.
All the guide step by step leads to success, as of today :)
It’s good to know, thanks.
Wondering if you had steps to persist the routes in redhat.
I don’t have the exact steps I’m afraid, but the following RedHat solution worked for me: https://access.redhat.com/solutions/288823.
Following this on AWS with Ubuntu 16.04, I’ve the following problem
After add the first rule, my main IP (on ens3) becomes unresponsive.
ip route add default via 172.31.48.1 dev ens4 table out
ip rule add from 172.31.58.30/20 table out
ip rule add to 172.31.58.30/20 table out
ip route flush cache
I need to restart the server (or the networking) to the main IP work, but then the secondary ip (on ens4) stops.
Trying to figure out what’s the cause, with no success
Tomas wrote an addendum for restarting the server. DHCP may assign eth1 as the default route (route -n), so instead, in your .cfg, you should use ‘static’ and not ‘dhcp’. See the section where he goes over “Make Static Routes Persistent after Reboot”
Thanks, perfect work
This was perfect. Thanks.
Thank you!
Arigato gozaimasu/danke/dhanyavaad
Your explanation really helped me to add a new NIC to existing EC2 instance and make it functional.
Doo itashimashite!
Hi
I found your article really useful in creating a second EIP for a Ubuntu instance via the terminal. However the command
ip route add default via 10.20.0.1 dev eth1 table out
fails to execute when included in the cfn:init portion of a cloudformation template.
Thanks
Craig
No worries, you’re welcome.