Installing a Graylog2 log management platform for collecting, indexing, and analysing data.
Graylog 1.3.x was referred to as Graylog2. Please check this article for upgrading Graylog from 1.3.x to 2.0.x.
Revision history (dd/mm/yy):
07/04/2016 – article has been updated to work with Graylog v1.3.
Software
Software used in this article:
- CentOS 6.6 (64bit) minimal with 8GB of RAM
- Java 1.8.0 openjdk
- ElasticSearch 1.7.1
- MongoDB 3.0.5
- Graylog server 1.1.6
- Graylog web 1.1.6
Suggestions
Use separate logical volumes for the mount points outlined below. Note that volume sizes highly depend on the amount of logs you are going to send.
/var/lib/mongo– 30GB/var/lib/elasticsearch– 100GB/var/lib/graylog-server– 20GB
We have SELinux set to enforcing mode.
EPEL Repository and Tools
CentOS Extras repository includes a package to install EPEL:
# yum install epel-release
Tools
We are going to need the following:
# yum install wget vim pwgen
Install Java
Install Java from CentOS updates repository:
# yum install -y java-1.8.0-openjdk java-1.8.0-openjdk-devel
Install Elasticsearch
Download and install the public signing key:
# rpm --import https://packages.elastic.co/GPG-KEY-elasticsearch
Create the /etc/yum.repos.d/elasticsearch.repo repository file:
# cat << EOL > /etc/yum.repos.d/elasticsearch.repo
[elasticsearch-1.7]
name=Elasticsearch repository for 1.7.x packages
baseurl=http://packages.elastic.co/elasticsearch/1.7/centos
gpgcheck=1
gpgkey=http://packages.elastic.co/GPG-KEY-elasticsearch
enabled=1
EOL
Install elasticsearch via yum:
# yum install -y elasticsearch
Configure Elasticsearch
The only important thing for Elasticsearch is that we set the exactly same cluster name (“cluster.name: graylog”) that is going to be used by Graylog2 in the Elasticsearch configuration.
Open /etc/elasticsearch/elasticsearch.yml. Set the cluster name:
cluster.name: graylog2
Disable dynamic searching:
script.disable_dynamic: true
Lock the memory:
bootstrap.mlockall: true
Disable multicast:
discovery.zen.ping.multicast.enabled: false
discovery.zen.ping.unicast.hosts: ["localhost:9300"]
Elasticsearch heap size defaults to 256M min, 1G max. It is recommended to set ES_HEAP_SIZE to 50% of available RAM, but no more than 31GB. Open /etc/sysconfig/elasticsearch and add the following lines:
ES_HEAP_SIZE=4G
MAX_OPEN_FILES=64000
Elasticsearch has to keep a lot of files open simultaneously and requires a higher open file limit that the usual operating system defaults allow.
We are going to configure the security limits file /etc/security/limits.conf to allow up to 64000 open file descriptors.
# echo "elasticsearch soft nofile 64000" >> /etc/security/limits.conf ;\
echo "elasticsearch hard nofile 64000" >> /etc/security/limits.conf
Enable and start Elasticsearch service:
# chkconfig --add elasticsearch
# service elasticsearch start
Test the service:
# curl -X GET 'http://127.0.0.1:9200/_cluster/health?pretty=true'
{
"cluster_name" : "graylog2",
"status" : "green",
"timed_out" : false,
"number_of_nodes" : 1,
"number_of_data_nodes" : 1,
"active_primary_shards" : 0,
"active_shards" : 0,
"relocating_shards" : 0,
"initializing_shards" : 0,
"unassigned_shards" : 0,
"delayed_unassigned_shards" : 0,
"number_of_pending_tasks" : 0,
"number_of_in_flight_fetch" : 0
}
If we ever need to delete all the indices, the following should do it:
# curl -XDELETE 'http://localhost:9200/_all'
We find it very useful for development when there is a need to reset the database.
Install MongoDB
Current stable MongoDB at the time of writing is v3.0.
Create the repository file for stable mongodb releases:
# cat << EOL > /etc/yum.repos.d/mongodb.repo
[mongodb-stable]
name=MongoDB Repository
#baseurl=https://repo.mongodb.org/yum/redhat/6/mongodb-org/stable/x86_64/
baseurl=https://repo.mongodb.org/yum/redhat/6/mongodb-org/3.0/x86_64/
gpgcheck=0
enabled=1
EOL
Install MondoDB:
# yum install -y mongo-10gen-server mongo-10gen
Configure MongoDB
We have MongoDB authentication set to false:
# egrep '^bind|^auth' /etc/mongod.conf
bind_ip=127.0.0.1
auth=false
Configure SELinux to allow MongoDB to listen on port 27017.
# yum -y install policycoreutils-python
# semanage port -a -t mongod_port_t -p tcp 27017
CentOS 6 place a max process limitation of 1024 which overrides ulimit settings. Append a file named /etc/security/limits.d/90-nproc.conf with new soft and hard nproc values to increase the process limit for mongod user:
# echo "mongod soft nproc 32000" >>/etc/security/limits.d/90-nproc.conf ;\
echo "mongod hard nproc 32000" >>/etc/security/limits.d/90-nproc.conf
Set soft and hard nofile values for mongod user:
# echo "mongod soft nofile 64000" >> /etc/security/limits.conf ;\
echo "mongo hard nofile 64000" >> /etc/security/limits.conf
Edit /boot/grub/grub.conf and add transparent_hugepage=never to the kernel line:
kernel /vmlinuz-2.6.32-504.30.3.el6.x86_64 ro root=/dev/mapper/VolGroup-lv_root rd_NO_LUKS KEYBOARDTYPE=pc KEYTABLE=uk LANG=en_US.UTF-8 rd_NO_MD rd_LVM_LV=VolGroup/lv_swap SYSFONT=latarcyrheb-sun16 crashkernel=auto rd_LVM_LV=VolGroup/lv_root rd_NO_DM rhgb quiet transparent_hugepage=never
Edit /etc/rc.local and add the following before “exit 0”:
if test -f /sys/kernel/mm/transparent_hugepage/khugepaged/defrag; then
echo 0 > /sys/kernel/mm/transparent_hugepage/khugepaged/defrag
fi
if test -f /sys/kernel/mm/transparent_hugepage/defrag; then
echo never > /sys/kernel/mm/transparent_hugepage/defrag
fi
if test -f /sys/kernel/mm/transparent_hugepage/enabled; then
echo never > /sys/kernel/mm/transparent_hugepage/enabled
fi
These should fix the following warnings:
WARNING: /sys/kernel/mm/transparent_hugepage/enabled is 'always'
WARNING: /sys/kernel/mm/transparent_hugepage/defrag is 'always'.
Enabled and start a service:
# chkconfig --add mongod
# service mongod start
Check:
# mongo
MongoDB shell version: 3.0.5
connecting to: test
> exit
bye
Install and Configure Graylog2 Server
Add repository for Graylog v1.3:
# rpm -Uvh https://packages.graylog2.org/repo/packages/graylog-1.3-repository-el7_latest.rpm
Install the Graylog server:
# yum install -y graylog-server pwgen
Generate a password_secret:
# sed -ie "s/^password_secret =.*/password_secret = $(pwgen -N 1 -s 96)/g" /etc/graylog/server/server.conf
Set up the admin account password:
# PASSWD=$(echo -n changeme|sha256sum|awk '{print $1}')
# sed -ie "s/^root_password_sha2 =.*/root_password_sha2 = $PASSWD/g" /etc/graylog/server/server.conf
Disable statistics:
# echo "usage_statistics_enabled" = false >>/etc/graylog/server/server.conf
The default discovery mode is multicast. Graylog will try to find other Elasticsearch nodes automatically. This usually works fine when everything is running on the same system but gets problematic quickly when running in a bigger network topology. Documentation recommends to use unicast for production setups.
Configure Zen unicast discovery in Graylog, open /etc/graylog/server/server.conf and add the following lines:
elasticsearch_discovery_zen_ping_multicast_enabled = false
elasticsearch_discovery_zen_ping_unicast_hosts = 127.0.0.1:9300
Also add root email address and set a timezone:
root_email = "root@localhost"
root_timezone = GMT
Set MongoDB authentication to false:
mongodb_useauth = false
Make sure the is_master is set to true:
is_master = true
We want to rotate the currently active index when it reaches 10GB (approximate), and we want to keep 9 indices in total. When the maximum number of indices is reached, we want to delete the oldest one.
Open /etc/graylog/server/server.conf and set the following parameters to achieve the above:
rotation_strategy = size
elasticsearch_max_size_per_index = 10737418240
elasticsearch_max_number_of_indices = 9
retention_strategy = delete
elasticsearch_index_prefix = graylog2
Open /etc/sysconfig/graylog-server and remove the following parameters from GRAYLOG_SERVER_JAVA_OPTS as support was removed in 8.0:
PermSize=128m MaxPermSize=256m
Also, set Xms and Xmx to something as below:
-Xms2G -Xmx4G
This will allow a use of 4GB of memory.
Start the service:
# /etc/init.d/graylog-server start
Check for any obvious errors:
# tail -f /var/log/graylog-server/server.log
Install and Configure Graylog2 Web Interface
Install the Graylog web frontend:
# yum install graylog-web
Set the URI to localhost:
# sed -ie "s/^graylog2-server\.uris=.*/graylog2-server\.uris=\"http:\/\/127.0.0.1:12900\/\"/g" /etc/graylog/web/web.conf
Set the application secret:
# sed -ie "s/^application\.secret=.*/application\.secret=\"$(pwgen -N 1 -s 96)\"/g" /etc/graylog/web/web.conf
Also, set a timezone in the /etc/graylog/web/web.conf file:
timezone="Europe/London"
Open /etc/sysconfig/graylog-web and adjust Java heap size:
GRAYLOG_WEB_JAVA_OPTS="-Xms512M -Xmx1G"
Start the service:
# /etc/init.d/graylog-web start
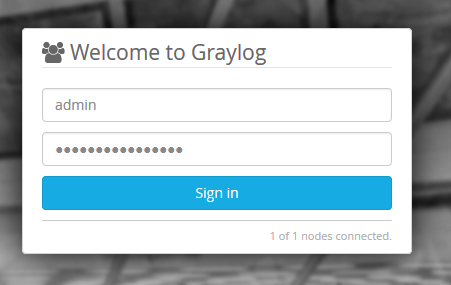
The web interface will listen on port 9000. Point your browser to it. Log in with username admin and the password you configured at root_password_sha2 in server.conf.
Check for any obvious errors:
# tail -f /var/log/graylog-web/server.log
Tuning Java Memory
For a VM with 8GB of RAM.
Elasticsearch
# grep ^ES_HEAP /etc/sysconfig/elasticsearch
ES_HEAP_SIZE=4G
Graylog Server
# grep Xms /etc/sysconfig/graylog-server
GRAYLOG_SERVER_JAVA_OPTS="-Xms2G -Xmx4G -XX:NewRatio=1 -server -XX:+ResizeTLAB -XX:+UseConcMarkSweepGC -XX:+CMSConcurrentMTEnabled -XX:+CMSClassUnloadingEnabled -XX:+UseParNewGC -XX:-OmitStackTraceInFastThrow"
Graylog Web
# grep Xms /etc/sysconfig/graylog-web
GRAYLOG_WEB_JAVA_OPTS="-Xms512M -Xmx1G"
Configure Apache with HTTPS for Graylog
Install httpd and mod_ssl packages, and generate a self-signed SSL certificate:
# yum install -y httpd mod_ssl
# cd /etc/ssl/certs
# openssl req -x509 -newkey rsa:2048 -keyout graylog.key \
  -out graylog.crt -days 1368 -nodes
# chmod 0640 graylog.key
Open /etc/httpd/conf.d/graylog2.conf and add the following:
NameVirtualHost *:443
ServerName localhost

<VirtualHost *:443>
  ServerName graylog.example.com
  ServerAlias graylog.example.com

  SSLEngine on
  SSLProtocol all -SSLv2 -SSLv3
  SSLCertificateFile /etc/ssl/certs/graylog.crt
  SSLCertificateKeyFile /etc/ssl/certs/graylog.key

  ProxyRequests Off
  <Proxy *>
    Order deny,allow
    Allow from all
  </Proxy>

  ProxyPass / http://localhost:9000/
  ProxyPassReverse / http://localhost:9000/

  <Location />
   Order allow,deny
   Allow from all
  </Location>
</VirtualHost>
<VirtualHost *:80>
  ServerName graylog.example.com
  Redirect / https://graylog.example.com/
</VirtualHost>
Restart the webserver.
Configure Graylog2 to Receive Messages
Syslog UDP Input
To add an input to receive syslog messages, click on Inputs in the System menu on the right side.
From the drop-down menu, select Syslog UDP and click Launch new input.
A “Launch a new input Syslog UDP” window will pop up. Enter the following information:
Title: syslog
Port: 514
Bind address: 0.0.0.0
Then click Launch. To send syslog from Linux hosts (rsyslog), use:
$template GRAYLOGRFC5424,"< %PRI%>%PROTOCOL-VERSION% %TIMESTAMP:::date-rfc3339% %HOSTNAME% %APP-NAME% %PROCID% %MSGID% %STRUCTURED-DATA% %msg%\n"
*.* @graylog.example.org:514;GRAYLOGRFC5424
GELF Input
The following nxlog.conf configuration reads the Windows EventLog and sends it to the Graylog2 server in GELF format.
define ROOT C:\Program Files (x86)\nxlog

Moduledir %ROOT%\modules
CacheDir %ROOT%\data
Pidfile %ROOT%\data\nxlog.pid
SpoolDir %ROOT%\data
LogFile %ROOT%\data\nxlog.log
SuppressRepeatingLogs TRUE

<Extension gelf>
  Module xm_gelf
</Extension>

<Input eventlog>
  # For Windows XP, 2000 and 2003 use the following:
  # Module im_mseventlog

  Module im_msvistalog
  ReadFromLast FALSE
  SavePos TRUE
  PollInterval 5

  # Uncomment the following to collect specific event logs only
  Query <QueryList>\
  <Query Id="0">\
  <Select Path="Application">*</Select>\
  <Select Path="System">*</Select>\
  <Select Path="Security">*</Select>\
  <Select Path="Microsoft-Windows-TerminalServices-Gateway/Operational">*</Select>\
  </Query>\
  </QueryList>
</Input>

<Output graylog>
  Module om_udp
  Host graylog.example.com
  Port 12201
  OutputType GELF
</Output>

<Route 1>
  Path eventlog => graylog
</Route>
References
http://opensourceeducation.net/graylog2-server-mongodb-installation-configuration-log-management-centos-rhel-6-x/
http://www.itzgeek.com/how-tos/linux/centos-how-tos/how-to-install-graylog2-on-centos-7-rhel-7.html
https://www.digitalocean.com/community/tutorials/how-to-install-graylog2-and-centralize-logs-on-ubuntu-14-04
http://docs.graylog.org/en/1.0/pages/configuring_es.html
http://docs.mongodb.org/manual/tutorial/transparent-huge-pages/
http://www.cloudworxx.us/what-we-love/graylog2/enable-https-for-graylog2-web-interface/
http://nxlog.org/docs/nxlog-ce/nxlog-reference-manual.html#xm_gelf
Related Posts
Graylog Server Upgrade from 1.3.x to 2.0.x on CentOS 6
Install Graylog Server 1.x on CentOS 7
Send Apache Logs to Graylog
Set up MongoDB Authentication for Graylog