Installing a Graylog2 log management platform for collecting, indexing, and analysing data.
Graylog v1.3.x was referred to as Graylog2.
Software
Software used in this article:
- CentOS 7.1.1503 (Core) minimal with 8GB of RAM
- Java 1.8.0 openjdk
- ElasticSearch 1.7.3
- MongoDB 3.2.0
- Graylog server 1.3.0
- Graylog web 1.3.0
LVM Setup (Optional)
We use separate logical volumes for the mount points outlined below. Note that volume sizes vary between systems and highly depend on the amount of logs that you are going to send.
/var/lib/mongo– 30GB/var/lib/elasticsearch– 100GB/var/lib/graylog-server– 20GB
Setup:
# vgcreate vg_graylog /dev/sdc
# lvcreate --name lv_mongo --size 30G vg_graylog
# lvcreate --name lv_elasticsearch --size 100G vg_graylog
# lvcreate --name lv_graylog-server --size 20G vg_graylog
# mkfs.ext4 -m0 -L mongo /dev/vg_graylog/lv_mongo
# mkfs.ext4 -m0 -L elasticsearch /dev/vg_graylog/lv_elasticsearch
# mkfs.ext4 -m0 -L graylog-server /dev/vg_graylog/lv_graylog-server
# tune2fs -c 50 -i 180d /dev/vg_graylog/lv_mongo
# tune2fs -c 50 -i 180d /dev/vg_graylog/lv_elasticsearch
# tune2fs -c 50 -i 180d /dev/vg_graylog/lv_graylog-server
# mkdir /var/lib/{mongo,elasticsearch,graylog-server}
# mount /dev/vg_graylog/lv_mongo /var/lib/mongo/
# mount /dev/vg_graylog/lv_elasticsearch /var/lib/elasticsearch/
# mount /dev/vg_graylog/lv_graylog-server /var/lib/graylog-server/
Update fstab.
We have SELinux set to enforcing mode.
EPEL Repository and Tools
CentOS Extras repository includes a package to install EPEL:
# yum install epel-release
Install Java
Install Java:
# yum install -y java-1.8.0-openjdk java-1.8.0-openjdk-devel
Install Elasticsearch
Download and install the public signing key:
# rpm --import https://packages.elastic.co/GPG-KEY-elasticsearch
Create the /etc/yum.repos.d/elasticsearch.repo repository file:
# cat << EOL > /etc/yum.repos.d/elasticsearch.repo
[elasticsearch-1.7]
name=Elasticsearch repository for 1.7.x packages
baseurl=http://packages.elastic.co/elasticsearch/1.7/centos
gpgcheck=1
gpgkey=http://packages.elastic.co/GPG-KEY-elasticsearch
enabled=1
EOL
Install Elasticsearch:
# yum install -y elasticsearch
Configure Elasticsearch
The only important thing for Elasticsearch is that we set the exactly same cluster name (“cluster.name: graylog”) that is going to be used by Graylog2 in the Elasticsearch configuration.
Open /etc/elasticsearch/elasticsearch.yml. Set the cluster name:
cluster.name: graylog2
Disable dynamic searching:
script.disable_dynamic: true
Lock the memory:
bootstrap.mlockall: true
Disable multicast:
discovery.zen.ping.multicast.enabled: false
discovery.zen.ping.unicast.hosts: ["localhost:9300"]
Elasticsearch heap size defaults to 256M min, 1G max. It is recommended to set ES_HEAP_SIZE to 50% of available RAM, but no more than 31GB. Open /etc/sysconfig/elasticsearch and add the following lines:
ES_HEAP_SIZE=4G
MAX_OPEN_FILES=64000
Elasticsearch has to keep a lot of files open simultaneously and requires a higher open file limit that the usual operating system defaults allow.
We are going to configure the security limits file /etc/security/limits.conf to allow up to 64000 open file descriptors.
# echo "elasticsearch soft nofile 64000" >> /etc/security/limits.conf ;\
echo "elasticsearch hard nofile 64000" >> /etc/security/limits.conf
Enable on boot and start the Elasticsearch service:
# systemctl enable elasticsearch
# systemctl restart elasticsearch
Test the service:
# curl -X GET 'http://127.0.0.1:9200/'
{
  "status" : 200,
  "name" : "John Doe",
  "cluster_name" : "graylog2",
  "version" : {
    "number" : "1.7.3",
    "build_hash" : "05d4530971ef0ea46d0f4fa6ee64dbc8df659682",
    "build_timestamp" : "2015-10-15T09:14:17Z",
    "build_snapshot" : false,
    "lucene_version" : "4.10.4"
  },
  "tagline" : "You Know, for Search"
}
If we ever need to delete all the indices, it’s useful to know the following:
# curl -XDELETE 'http://localhost:9200/_all'
We find it very helpful for development when there is a need to reset the database.
Install MongoDB
Current stable MongoDB at the time of writing: v3.2.
Create a mongodb-stable repository file:
# cat << EOL > /etc/yum.repos.d/mongodb.repo
[mongodb-stable]
name=MongoDB Repository
#baseurl=https://repo.mongodb.org/yum/redhat/7/mongodb-org/stable/x86_64/
baseurl=https://repo.mongodb.org/yum/redhat/7/mongodb-org/3.2/x86_64/
gpgcheck=0
enabled=1
EOL
Install MondoDB:
# yum install -y mongo-10gen-server mongo-10gen
Configure MongoDB
Configure SELinux to allow MongoDB to listen on port 27017.
# yum -y install policycoreutils-python
# semanage port -a -t mongod_port_t -p tcp 27017
CentOS 7 place a max process limitation of 4096 which overrides ulimit settings. Append a file named /etc/security/limits.d/90-nproc.conf with new soft and hard nproc values to increase the process limit for mongod user:
# echo "mongod soft nproc 32000" >>/etc/security/limits.d/90-nproc.conf ;\
echo "mongod hard nproc 32000" >>/etc/security/limits.d/90-nproc.conf
Set soft and hard nofile values for mongod user:
# echo "mongod soft nofile 64000" >> /etc/security/limits.conf ;\
echo "mongo hard nofile 64000" >> /etc/security/limits.conf
Enable on boot and start the service:
# systemctl enable mongod
# systemctl start mongod
Install and Configure Graylog2
Add repository:
# rpm -Uvh https://packages.graylog2.org/repo/packages/graylog-1.3-repository-el7_latest.rpm
Install Graylog server with web frontend:
# yum install -y graylog-server graylog-web pwgen
Configure Graylog Server
Generate a password_secret for:
# sed -ie "s/^password_secret =.*/password_secret = $(pwgen -N 1 -s 96)/g" /etc/graylog/server/server.conf
Set up the admin account password:
# PASSWD=$(echo -n changeme|sha256sum|awk '{print $1}')
# sed -ie "s/^root_password_sha2 =.*/root_password_sha2 = $PASSWD/g" /etc/graylog/server/server.conf
Disable statistics:
# echo "usage_statistics_enabled" = false >>/etc/graylog/server/server.conf
The default discovery mode is multicast. Graylog will try to find other Elasticsearch nodes automatically. This usually works fine when everything is running on the same system but gets problematic quickly when running in a bigger network topology. Documentation recommends to use unicast for production setups.
Configure Zen unicast discovery in Graylog, open /etc/graylog/server/server.conf and add the following lines:
elasticsearch_discovery_zen_ping_multicast_enabled = false
elasticsearch_discovery_zen_ping_unicast_hosts = 127.0.0.1:9300
Also add root email address and set a timezone:
root_email = "root@localhost"
root_timezone = GMT
Make sure the is_master is set to true:
is_master = true
Configure Old Indices Retention Strategy
Retention strategy depends on requirements.
In our case, we have allocated 100GB to the elasticsearh mountpoint /var/lib/elasticsearch and are going to configure Graylog with that number in mind.
We want to rotate the currently active index when it reaches 10GB (approximate), and we want to keep 9 indices in total. When the maximum number of indices is reached, we want to delete the oldest one.
Open /etc/graylog/server/server.conf and set the following parameters to achieve the above:
rotation_strategy = size
elasticsearch_max_size_per_index = 10737418240
elasticsearch_max_number_of_indices = 9
retention_strategy = delete
elasticsearch_index_prefix = graylog2
Configure Java Parameters
Open /etc/sysconfig/graylog-server and remove the following parameters from GRAYLOG_SERVER_JAVA_OPTS as support was removed in 8.0:
PermSize=128m MaxPermSize=256m
Also, set Xms and Xmx to something as below:
-Xms1G -Xmx2G
This will allow a use of 2GB of memory.
Start Graylog2 Service
Enable on boot and start the service:
# systemctl enable graylog-server
# systemctl start graylog-server
Configure Graylog2 Web Interface
Set the URI to localhost:
# sed -ie "s/^graylog2-server\.uris=.*/graylog2-server\.uris=\"http:\/\/127.0.0.1:12900\/\"/g" /etc/graylog/web/web.conf
Set the application secret:
# sed -ie "s/^application\.secret=.*/application\.secret=\"$(pwgen -N 1 -s 96)\"/g" /etc/graylog/web/web.conf
Also, set a timezone in the /etc/graylog/web/web.conf file:
timezone="Europe/London"
Open /etc/sysconfig/graylog-web and adjust Java heap size:
GRAYLOG_WEB_JAVA_OPTS="-Xms512M -Xmx1G"
Enable on boot and start the service:
# systemctl enable graylog-web
# systemctl start graylog-web
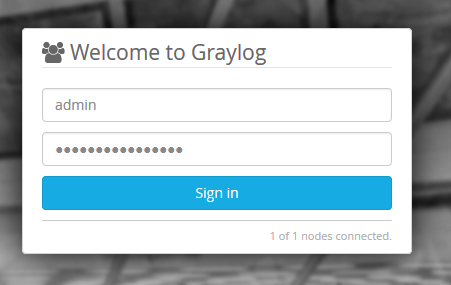
The web interface will listen on port 9000. Point your browser to it.
You may need to configure firewall for that:
# iptables -A INPUT -s 10.0.0.0/8 -p tcp -m multiport --dports 9000 -j ACCEPT
Log in with username admin and the password you configured at root_password_sha2 in server.conf.
Configure Apache with HTTPS for Graylog
Install httpd and mod_ssl packages, and generate a self-signed SSL certificate:
# yum install -y httpd mod_ssl
# cd /etc/ssl/certs
# openssl req -x509 -newkey rsa:2048 -keyout graylog.key \
  -out graylog.crt -days 1368 -nodes
# chmod 0640 graylog.key
Open /etc/httpd/conf.d/graylog2.conf and add the following:
NameVirtualHost *:443
ServerName localhost

<VirtualHost *:443>
  ServerName graylog.example.com
  ServerAlias graylog.example.com

  SSLEngine on
  SSLProtocol all -SSLv2 -SSLv3
  SSLCertificateFile /etc/ssl/certs/graylog.crt
  SSLCertificateKeyFile /etc/ssl/certs/graylog.key

  ProxyRequests Off
  <Proxy *>
    Order deny,allow
    Allow from all
  </Proxy>

  ProxyPass / http://localhost:9000/
  ProxyPassReverse / http://localhost:9000/

  <Location />
   Order allow,deny
   Allow from all
  </Location>
</VirtualHost>
<VirtualHost *:80>
  ServerName graylog.example.com
  Redirect / https://graylog.example.com/
</VirtualHost>
Ensure the proxy module is loaded:
# httpd -M|grep proxy_module
Syntax OK
 proxy_module (shared)
 proxy_http_module (shared)
Enable on boot and restart the service:
# systemctl enable httpd
# systemctl restart httpd
You may need to configure firewall for that:
# iptables -A INPUT -s 10.0.0.0/8 -p tcp -m multiport --dports 80,443 -j ACCEPT
Related Posts
Install Graylog2 Server on CentOS 6
Set up MongoDB Authentication for Graylog
I followed this and all the services are started but I can’t access the web interface at :9000 it just hangs
What do the logs say?
Great tutorial on installing Graylog, thanks! Although this solution works for most, there is an alternative that comes in handy when Graylog doesn’t work out for any reason: it’s NXLog, another open source, centralized log management system, available for free – https://nxlog.co/products/nxlog-community-edition – and since it provides unmatched scalability while keeping up the high-performance, and it’s able to collect logs from Linux, Windows, Android and other operating systems, it can really be a good tool to if these features are required.
I don’t mind sensible promotion, but I would like to disagree.
NXLog CE is a free log collector and I use it myself to send Windows Event Logs to Graylog. This is the area where NXLog CE works great. However, NXLog CE is just a log collector (I think of it as a syslog-ng server). Unless you use it together with Kibana and Elasticsearch to search and visualise data, I just cannot see how it can be called an alternative to Graylog.
An alternative to Graylog would the ELK (Elasticsearch/Logstash/Kibana) stack, or the Elastic Stack. I deployed and tested several open source log management systems (NXLog CE included) trying to pick the one that met my requirements, and Graylog topped the list. I really liked Kibana, but it didn’t have a built-in LDAP support back then, and I also had to write an init script to be able to start the service.