We are going to install Puppet Enterprise (PE) server on Red Hat Enterprise Linux 7.
Note that we can download and install Puppet Enterprise on up to 10 nodes at no charge. No license key is needed to run PE on up to 10 nodes.
This article is part of our RHCA studies.
Software
Software used in this article:
- Red Hat Enterprise Linux 7.0 (also tested on CentOS 7.2)
- Puppet Enterprise 3.7.0
Our Evaluation Environment
Software Requirements
We use a RHEL 7.0 virtual server in this article. FQDN of the VM is pe.hl.local.
Chrony has been configured for time keeping. DNS resolution has been configured on a separate lab DNS server.
SELinux is set to enforcing mode.
Hardware Requirements
Our VM has the following specs:
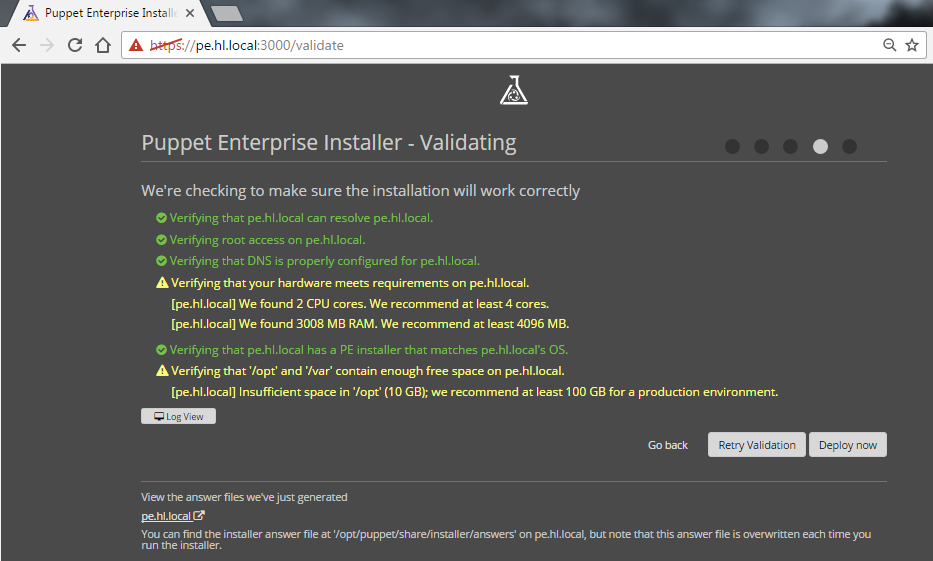
- 2 CPU cores
- 3 GB RAM + 2GB SSD-backed swap
/opt– 10GB for PuppetDB (basic install takes approx 1.5GB)/– 16GB
Monolithic Installation
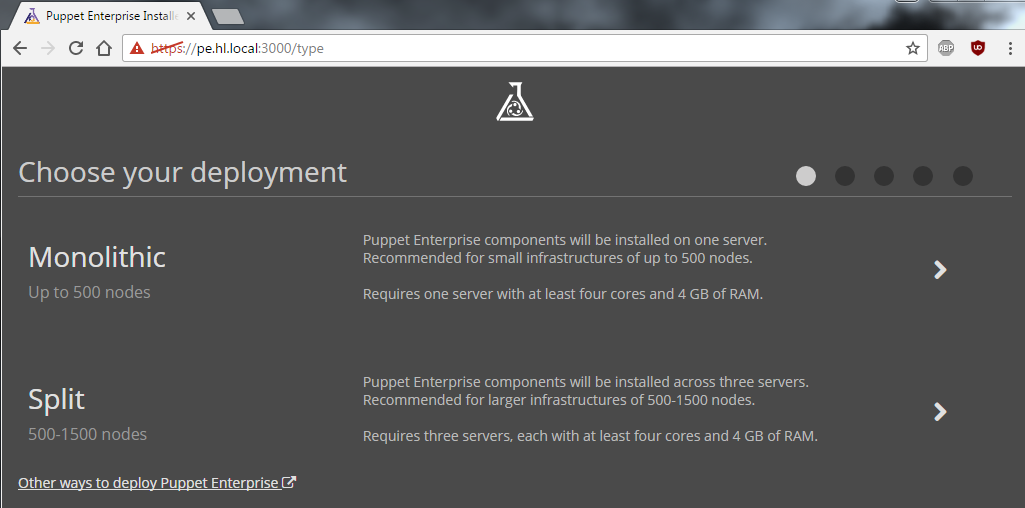
There are two different PE installation methods available, monolithic installation and split installation. We’re going to use the monolithic installation in this article.
With monolithic installation the Puppet master, the PE console, and PuppetDB (with PostgreSQL) are all installed on one node. Because all components are on one node, this installation type is easier to install, upgrade and troubleshoot.
We can later expand this installation type by adding compile masters to it. This type of installation is recommended for deployments up to 500 agent nodes.
Firewall Configuration for Monolithic Installs
Configure firewalld to accommodate PE network traffic:
# firewall-cmd --permanent --add-service=https
# firewall-cmd --permanent --add-port={8140/tcp,61613/tcp}
# firewall-cmd --reload
Downloading Puppet Enterprise
We’re not goint to put any direct links here as these tend to get broken, therefore please navigate to https://puppet.com/download-puppet-enterprise and download a PE tarball.
The RHCA EX405 exam is based on Puppet Enterprise 3.6 and Satellite 6.1. Information has been confirmed by Red Hat Training using the Certification Comment Form (http://www.redhat.com/training/certification/comments.html).
Taking the above into account, the PE version that we are going to use is 3.7.0 (mainly because 3.6 is no longer available for download on the Puppet website).
We are aware that 3.7.0 release of Puppet Enterprise has been superseded and may contain known bugs or security issues, but for testing purposes it’s more important to match the EX405 exam environment than to use the newest version available.
Verify the Installer
Verify the installer:
# wget -O - https://downloads.puppetlabs.com/puppetlabs-gpg-signing-key.pub | gpg --import
[...]
gpg: /root/.gnupg/trustdb.gpg: trustdb created
gpg: key 4BD6EC30: public key "Puppet Labs Release Key (Puppet Labs Release Key) <[email protected]>" imported
gpg: Total number processed: 1
gpg:               imported: 1  (RSA: 1)
gpg: no ultimately trusted keys found
Now, verify the release signature on the tarball by running:
# gpg --verify puppet-enterprise-3.7.0-el-7-x86_64.tar.gz.asc
gpg: Signature made Wed 05 Nov 2014 02:10:12 GMT using RSA key ID 4BD6EC30
gpg: Good signature from "Puppet Labs Release Key (Puppet Labs Release Key) <[email protected]>"
gpg: WARNING: This key is not certified with a trusted signature!
gpg:          There is no indication that the signature belongs to the owner.
Primary key fingerprint: 47B3 20EB 4C7C 375A A9DA  E1A0 1054 B7A2 4BD6 EC30
These are for references:
# md5sum ./*
c500a0dd6e4d8f861c3ff0f5d22c0774  ./puppet-enterprise-3.7.0-el-7-x86_64-agent.tar.gz
c3af6c0a2c448bbaf4662ee49ae0409f  ./puppet-enterprise-3.7.0-el-7-x86_64-agent.tar.gz.asc
407f478ff1ae9fa96b612089f2638f80  ./puppet-enterprise-3.7.0-el-7-x86_64.tar.gz
db8a72098db92ef3b7a5935cdf181679  ./puppet-enterprise-3.7.0-el-7-x86_64.tar.gz.asc
Monolithic Installation: Step 1
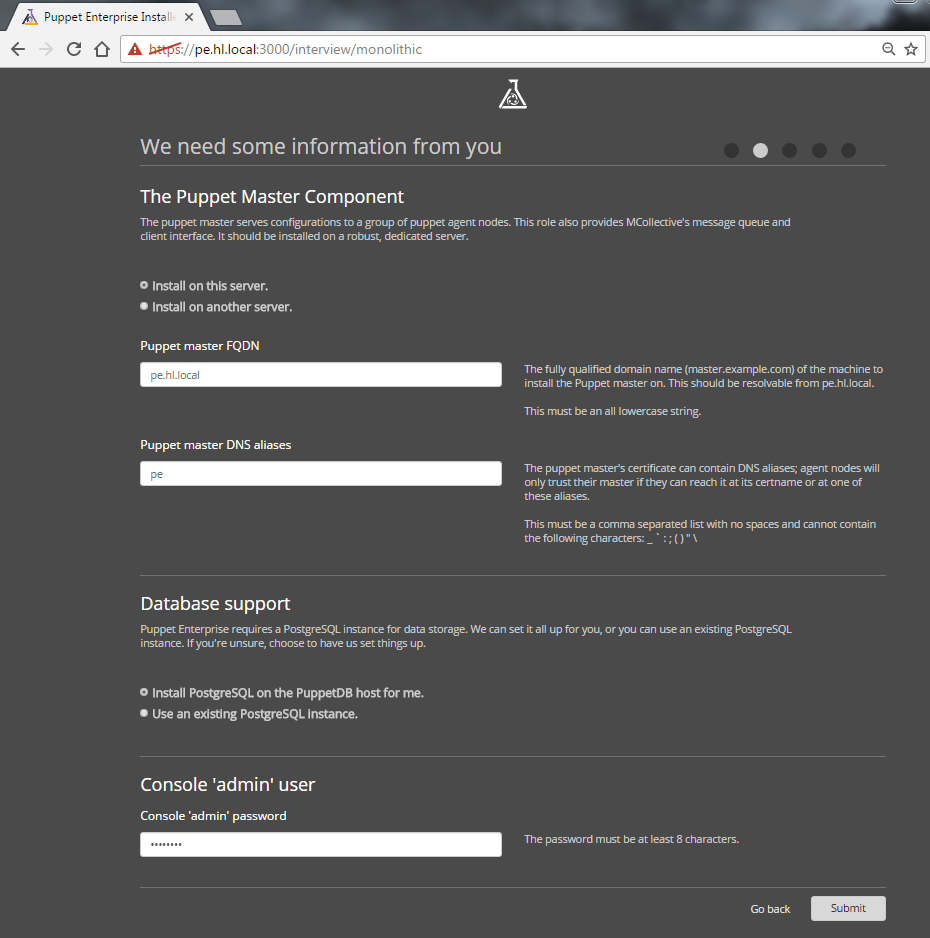
As mentioned previously, a monolithic installation of PE deploys everything on a single VM: the Puppet master, the PE console and PuppetDB components.
We need to ensure that port 3000 is reachable as the web-based installer uses this port. We can close this port when the installation is complete. Alternatively use without a –permanent flag:
# firewall-cmd --add-port=3000/tcp
The web-based installer does not support sudo configurations with Defaults targetpw or Defaults rootpw. Make sure that /etc/sudoers file does not contain those lines.
Also, the ‘ (single quote) is forbidden in all passwords.
Unpack the tarball:
# tar xf ./puppet-enterprise-3.7.0-el-7-x86_64.tar.gz
# cd ./puppet-enterprise-3.7.0-el-7-x86_64
I prefer screen to avoid installation being interrupted:
# screen
In brief, screen is a full-screen software program that can be used to multiplexes a physical console between several processes (typically interactive shells).
From the PE installer directory, run the installer script:
# ./puppet-enterprise-installer
========================================================================================================================

Puppet Enterprise v3.7.0 installer

Puppet Enterprise documentation can be found at http://docs.puppetlabs.com/pe/3.7/

------------------------------------------------------------------------------------------------------------------------

STEP 1: GUIDED INSTALLATION

Before you begin, choose an installation method. We've provided a few paths to choose from.

- Perform a guided installation using the web-based interface. Think of this as an installation interview in which
we ask you exactly how you want to install PE. In order to use the web-based installer, you must be able to access
this machine on port 3000 and provide the SSH credentials of a user with root access. This method will login to
servers on your behalf, install Puppet Enterprise and get you up and running fairly quickly.

- Use the web-based interface to create an answer file so that you login to the servers yourself and perform the
installation locally. Refer to Answer File Installation (http://docs.puppetlabs.com/pe/3.7/install_automated.html),
which provides an overview on installing PE with an answer file.

- If you choose not to use the web-based interface, you can write your own answer file or use the answer file(s)
provided in the PE installation tarball. Check the Answer File Reference Overview
(http://docs.puppetlabs.com/pe/3.7/install_answer_file_reference.html) to get started.

?? Install packages and perform a guided install? [Y/n] Y

Installing setup packages.

Please go to https://pe.hl.local:3000 in your browser to continue installation. Be sure to use https:// and
that port 3000 is reachable through the firewall.
Be advise that we need to leave our terminal connection open until the installation is complete; otherwise the installation will fail. To be on a safe side, we will detach the screen session.
To detach the screen, press “Ctrl-A” and “d”:
[detached from 2353.pts-0.pe]
[root@pe ~]#
# screen -ls
There is a screen on:
        2353.pts-0.pe      (Detached)
1 Socket in /var/run/screen/S-root.
The screen can be re-attached with “screen -r”.
At this point, the PE installer will start a web server and provide a web address: https://pe.hl.local:3000.
Copy the address into your browser and continue on to Monolithic Installation: Part 2.
Monolithic Installation: Step 2
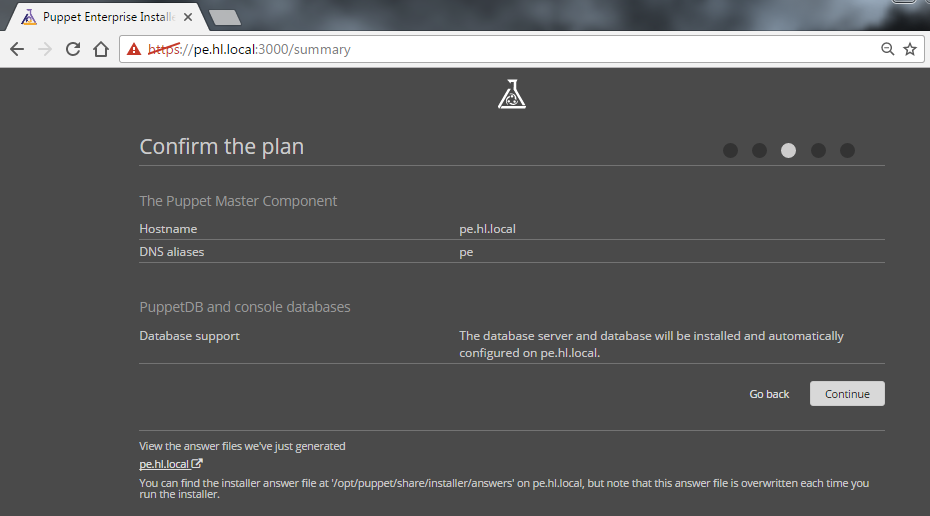
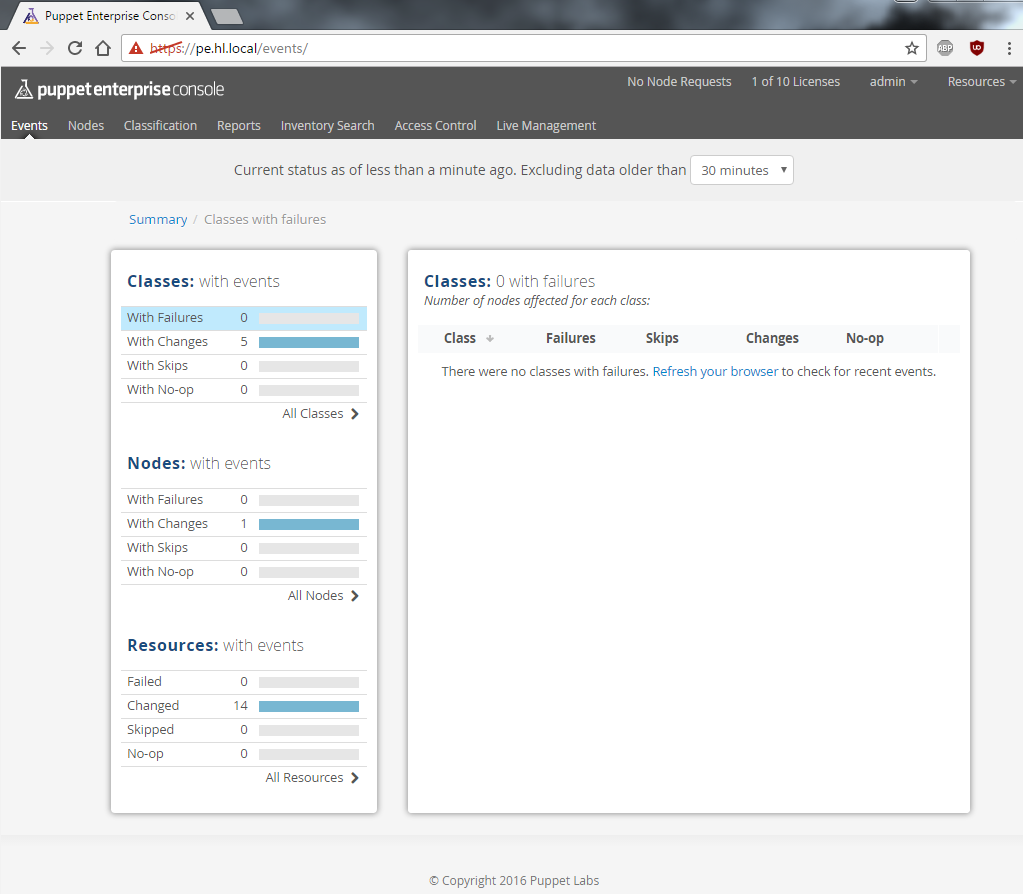
Follow the screenshots, they are left explanatory.

If at this point you will open the Log View, you will notice the script installing the following packages:
# yum -y -d2 install ‘libxslt’ ‘pciutils’ ‘zlib’ ‘which’ ‘libxml2’ ‘net-tools’ ‘libjpeg’ ‘curl’ ‘system-logos’ ‘mailcap’ ‘pe-cloud-provisioner’ ‘pe-cloud-provisioner-libs’ ‘pe-agent’ ‘pe-ruby-ldap’ ‘pe-rubygem-net-ssh’ ‘pe-java’ ‘pe-puppetserver’ ‘pe-puppetserver-common’ ‘pe-license’ ‘pe-puppet-license-cli’ ‘pe-puppetdb-terminus’ ‘pe-console-services-termini’ ‘pe-httpd’ ‘pe-passenger’ ‘pe-rubygem-rack’ ‘pe-mcollective-client’ ‘pe-postgresql’ ‘pe-puppet-dashboard’ ‘pe-bundler’ ‘pe-libevent’ ‘pe-memcached’ ‘pe-live-management’ ‘pe-console-auth’ ‘pe-console’ ‘pe-certificate-manager’ ‘pe-license’ ‘pe-license-status’ ‘pe-event-inspector’ ‘pe-console-services’ ‘pe-postgresql-server’ ‘pe-postgresql-contrib’ ‘pe-postgresql’ ‘pe-java’ ‘pe-puppetdb’
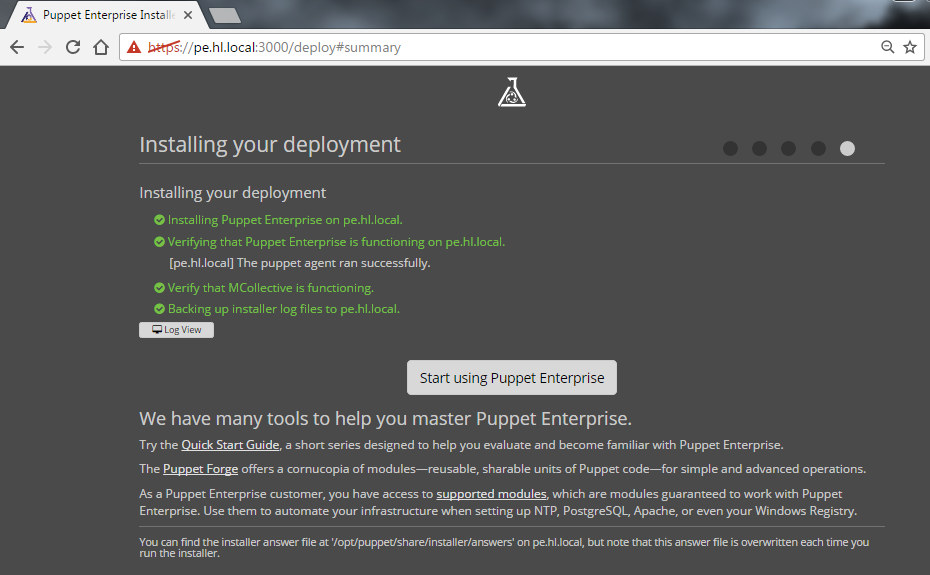
Puppet Enterprise has been installed to /opt/puppet, and its configuration files are located in /etc/puppetlabs.
Puppet installation notes say that we have to ensure the following TCP ports are open: 443, 4433, 4435, 8140, 61613.
Everything should be running:
# systemctl status -l pe-puppet.service
# /opt/puppet/bin/puppet resource service
Quick Start Guide
https://docs.puppet.com/pe/3.7/quick_start.html
References
https://docs.puppet.com/pe/3.7/index.html
I think there is typo in the heading and the first line. wouldn’t it be “puppet” instead of “pupper”?
You’re right, I just fixed that, thank you.
You are welcome. You forgot one in the first line though.